DigtialOcean is a cloud hosting provider with simple and affordable pricing to deploy your apps. Create an account and follow the instructions below.
Droplet Setup
Make a selection on your distribution. For our tutorial purpose, we will set up an Ubuntu 16.04.0 x64 droplet.
- 1GB Standard Droplet
- Datacenter region (New York in my case)
In your Linux terminal generate an SSH Key:
ssh-keygen
Ignore the passphrase
sudo vi .ssh/id_rsa.pub
Copy the SSH key and paste into “New SSH Key” in DigitalOcean setup screen. Now you can SSH into your droplet.
ssh root@Your-Droplets-IP-Address
Custom Domain for Droplet
Login into your domain name registrar. Edit the DNS settings for that particular domain name. Set the following settings:
- ns1.digitalocean.com
- ns2.digitalocean.com
- ns3.digitalocean.com
Once done, head to DigitalOcean and click the Networking tab. Enter the domain name and click Add Domain.
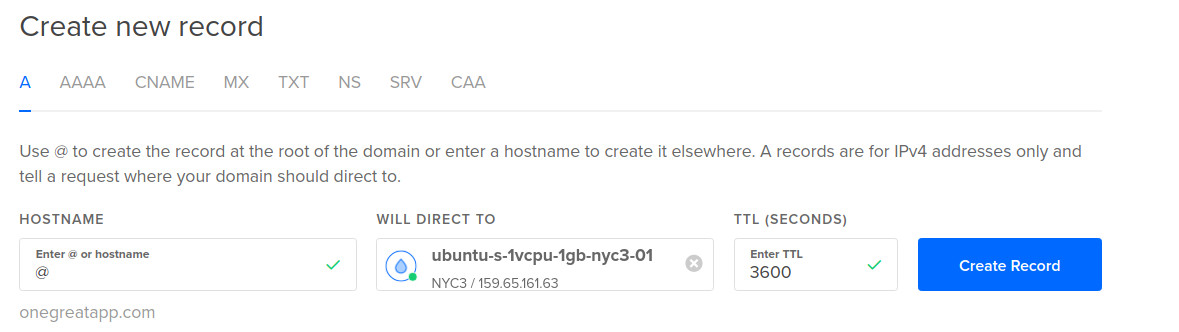
Create a new “A” record. Insert “@” under HOSTNAME and select your droplet under “WILL DIRECT TO.”
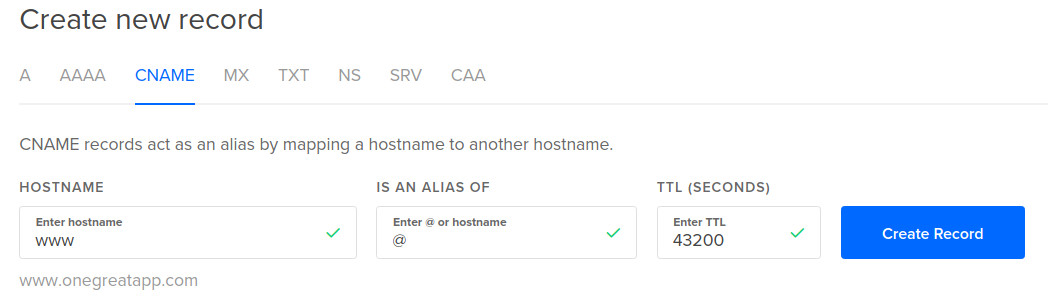
Create a “CNAME” record. Insert “www” under HOSTNAME and enter “@” under “IS AN ALIAS OF.”
FileZilla SFTP Your Droplet
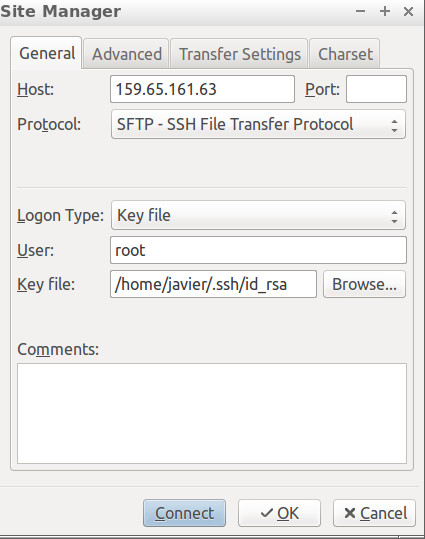
Under “Host” enter your droplet’s IP address. Select SFTP as the “Protocol”. “Logon Type” should be Key file. The “User” is root. Finally, browse your local machine’s directories and select your Private Key file. Once done, click Connect.
What’s Next?
You can install the LAMP stack on your droplet; it’s your virtual machine/sandbox on the cloud.
Sources:
Brad Traversy’s “App Hosting With Digital Ocean“